

Successful aerospace assembly depends on accurate bearing installation. Even minor errors can affect alignment, increase component wear, and create unnecessary rework. Using the right bearing install tools and following a consistent process helps manufacturers and maintenance teams achieve dependable results while protecting valuable components. A structured installation checklist improves workflow, supports quality assurance, and reduces variation between technicians. It also helps organizations meet demanding aerospace standards by encouraging repeatable procedures throughout production and maintenance operations.
This guide provides a practical step-by-step checklist to help aerospace manufacturers and MRO teams improve installation accuracy, reduce common mistakes, and maintain consistent assembly quality.
Why Every Aerospace Team Needs an Installation Checklist
A standardized installation process improves consistency across every project. Whether assembling new components or performing maintenance, following the same procedure reduces unnecessary variation and helps maintain quality.
An installation checklist also ensures that technicians verify each step before moving forward. This reduces the likelihood of installation errors while improving documentation and inspection processes.
Using professional aerospace bearing tools further strengthens the process by supporting accurate installations and protecting surrounding components.
Pre-Installation Inspection
Every successful installation begins with a thorough inspection.
Before installing a bearing, confirm that all parts meet the required specifications and are free from damage or contamination. Inspect the housing, shaft, and bearing surfaces for wear, debris, or defects that could affect assembly.
Verify that:
- The correct bearing has been selected.
- Components are clean and undamaged.
- Dimensions match engineering requirements.
- Required documentation is available.
- Appropriate bearing tools are ready for use.
Taking a few minutes to complete these checks helps prevent avoidable installation problems later in the process.
Selecting the Correct Installation Tool
Choosing the proper tooling is just as important as selecting the correct bearing.
Different applications require different installation methods. The wrong tool may apply uneven force, damage the bearing, or affect component alignment.
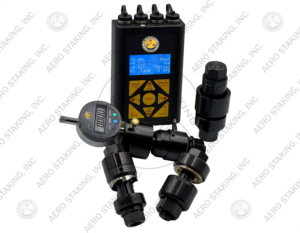
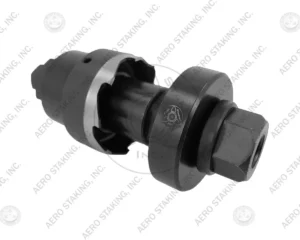
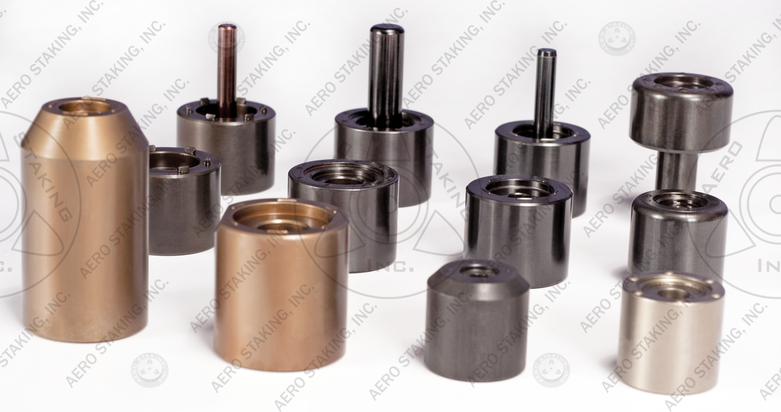
A properly sized bearing press tool distributes installation force evenly while reducing stress on surrounding parts. For more specialized applications, dedicated Bearing Installation Tools provide additional control and support accurate positioning.
When selecting tooling, consider:
- Bearing size and design
- Installation access
- Assembly requirements
- Production volume
- Manufacturer recommendations
Using the correct tools for bearings improves both efficiency and installation quality.
Step-by-Step Installation Process
Following a structured installation procedure helps produce consistent results.
Step 1: Prepare the Work Area
Clean the workspace and organize all required tooling before beginning the installation.
Step 2: Position the Components
Align the bearing and housing carefully to avoid unnecessary stress during installation.
Step 3: Install the Bearing
Use the appropriate bearing install tools or a precision bearing press tool to apply a controlled, even force throughout the installation.
Step 4: Confirm Proper Seating
Check that the bearing is fully seated according to engineering specifications without excessive force or misalignment.
Step 5: Document the Process
Record inspection results and complete any required quality assurance documentation before releasing the assembly.
Post-Installation Verification
Installation does not end when the bearing is in place. Verify that the bearing is properly aligned and rotates as expected without signs of binding or damage. Inspect surrounding components to confirm that no installation marks or deformation occurred during assembly.
A final inspection should also confirm that all quality requirements have been met before the component moves to the next production stage.
Using reliable bearing equipment supports consistent inspection results and helps maintain production standards.
Common Mistakes to Avoid
Even experienced technicians can encounter installation issues if procedures are not followed carefully.
Common mistakes include:
- Using the wrong installation tool
- Applying excessive force
- Installing contaminated components
- Skipping inspection steps
- Failing to verify alignment
- Incomplete documentation
Avoiding these errors improves assembly quality and reduces unnecessary rework.
Installation Checklist
| Step | Verification |
| Inspect bearing and components | ✓ Clean and damage-free |
| Verify dimensions | ✓ Match engineering specifications |
| Select the correct tooling | ✓ Proper bearing press kit or installation tool |
| Align components | ✓ Correct positioning before installation |
| Install bearing | ✓ Apply controlled force evenly |
| Verify seating | ✓ Bearing fully installed |
| Inspect final assembly | ✓ No visible damage or misalignment |
| Complete documentation | ✓ Quality records updated |
Frequently Asked Questions
Why are bearing install tools important?
Bearing install tools help ensure accurate installation while reducing the risk of bearing or component damage.
What does a bearing press tool do?
A bearing press tool applies controlled force to install bearings evenly and maintain proper alignment.
Why should aerospace teams use installation checklists?
Checklists standardize procedures, reduce errors, and improve consistency across production and maintenance activities.
What is included in a bearing press kit?
A bearing press kit typically includes components designed to support accurate bearing installation for different applications.
How do aerospace bearing tools improve quality?
Aerospace bearing tools help technicians complete installations more accurately while supporting repeatable manufacturing processes.
Improve Installation Consistency with the Right Tools
Following a structured installation checklist helps aerospace manufacturers and MRO teams improve quality, reduce installation errors, and maintain consistent production standards. Combined with professional bearing install tools, a documented process supports accurate assembly and long-term equipment reliability.
Explore Aero Staking’s Bearing Installation Tools, Bearing Press Tools, and Bearing Kits, or contact us today to discuss your application or request a quote.